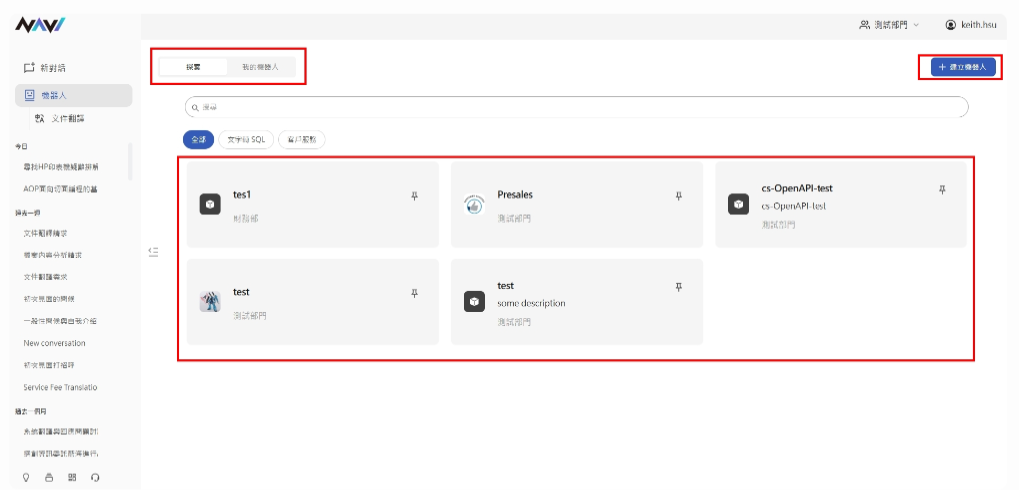
Step1: Create a Customer Service Bot
The bot is located in the second row of the feature bar. Clicking it opens the bot search page, where you can click "Create Bot" to begin building your bot.
-
Click "Create Bot"
-
Icon: Upload an icon for this bot (optional)
-
Name: Enter a name for this bot (required)
-
Description: Enter a description for this bot (optional)
-
Category: Select the type of bot you want to create (required)
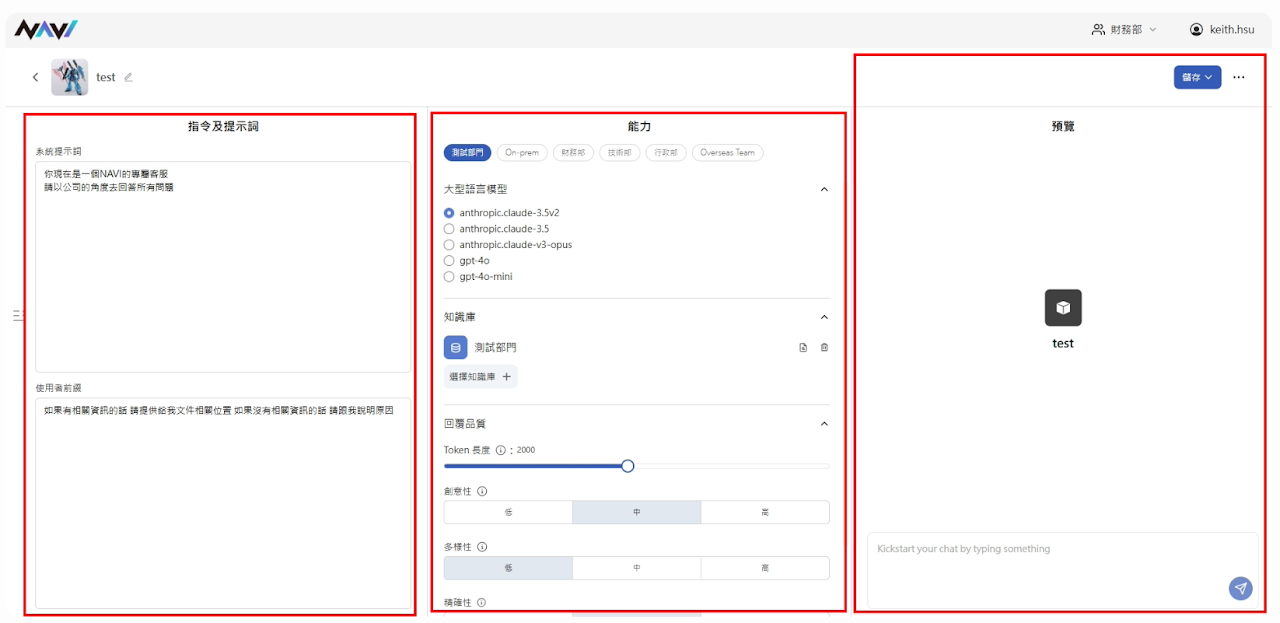
Step 2: Configure the Customer Service Bot
The customer service bot can be configured for specific scenarios or contexts.
-
Instructions & Prompts:
- System Prompt: Customize the system prompt for this bot. Enter rules or role instructions you want applied to every response — for example: "Only answer questions related to credit cards. Decline all other inquiries."
- User Prefix: Content added here will be prepended to every message the user sends — for example: "Please refer to the relevant data sources."
-
Capabilities:
- Select Department: The default department is based on the one selected in the navigation bar, but you can also choose another department within your accessible permissions.
- Large Language Model (LLM): Choose the LLM this bot will use. The available models are limited to those accessible by the selected department.
- Knowledge Base: Select the knowledge base this bot will reference. Available knowledge bases are limited to those accessible by the selected department. Note that each knowledge base can only be linked to one bot — duplicate assignments are not allowed.
- Parameters: Configure the LLM parameters that affect how the bot responds. From top to bottom: Temperature, Top-P, Top-K, and Retrieval Scope.
- Preview: Test your bot by entering a prompt here to preview its output.
- Bot Name: Click the edit option next to the bot name in the top-left corner to rename it.
- Save: Click "Save" in the top-right corner of the editing page to save your changes. You will then be prompted to select a publishing audience — currently, customer service bots can only be published to the selected department.
- Additional Options: Click the "…" menu on the editing page to access:
- Delete: Permanently delete this bot.
- Copy API Path: Copy the bot's API endpoint directly. You can use this endpoint to communicate with the bot programmatically. Calls must be made via POST requests.
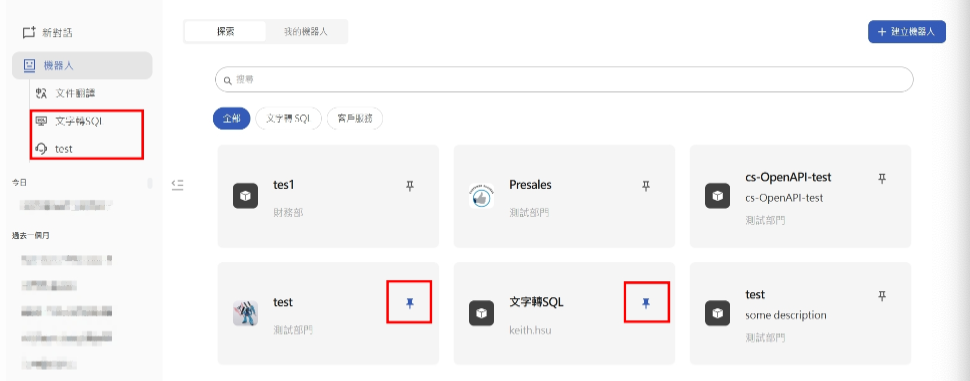
Step 3: Use the Customer Service Bot
-
Once your bot is configured, return to the bot page, find the bot you just created, and pin it. Pinned bots will appear permanently in the left-side feature bar for quick access.
-
Click the bot in the left panel to start a conversation. Customer service bots differ from regular chat rooms — each bot can be assigned a distinct role via its system prompt, and it will respond based on that role and its linked knowledge base. Common use cases include bank credit card support bots, travel itinerary planning bots, and internal HR training bots.