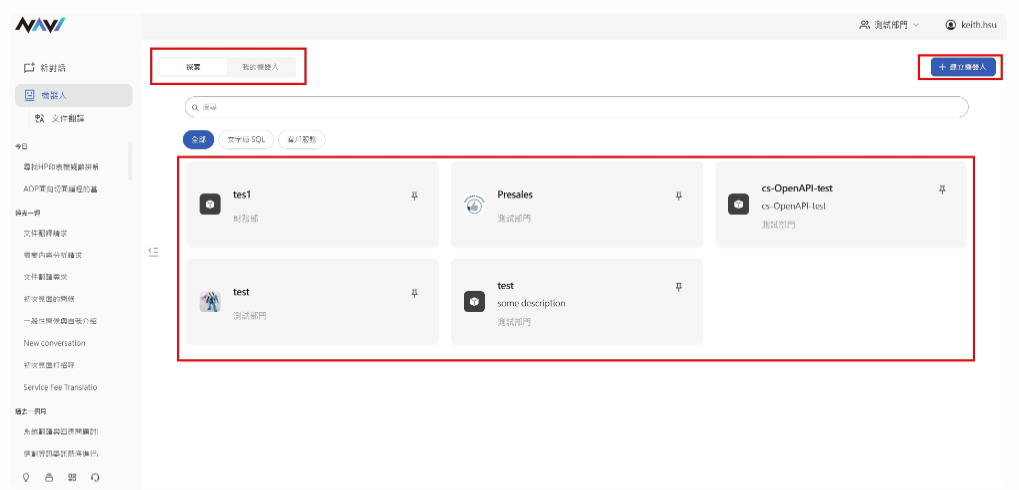
Step1: Create a Text2SQL Bot
The bot is located in the second row of the feature bar. Clicking it opens the bot search page, where you can click "Create Bot" to begin building your bot.
- Click "Create Bot"
- Icon: Upload an icon for this bot (optional)
- Name: Enter a name for this bot (required)
- Description: Enter a description for this bot (optional)
- Category: Select the type of bot you want to create (required)
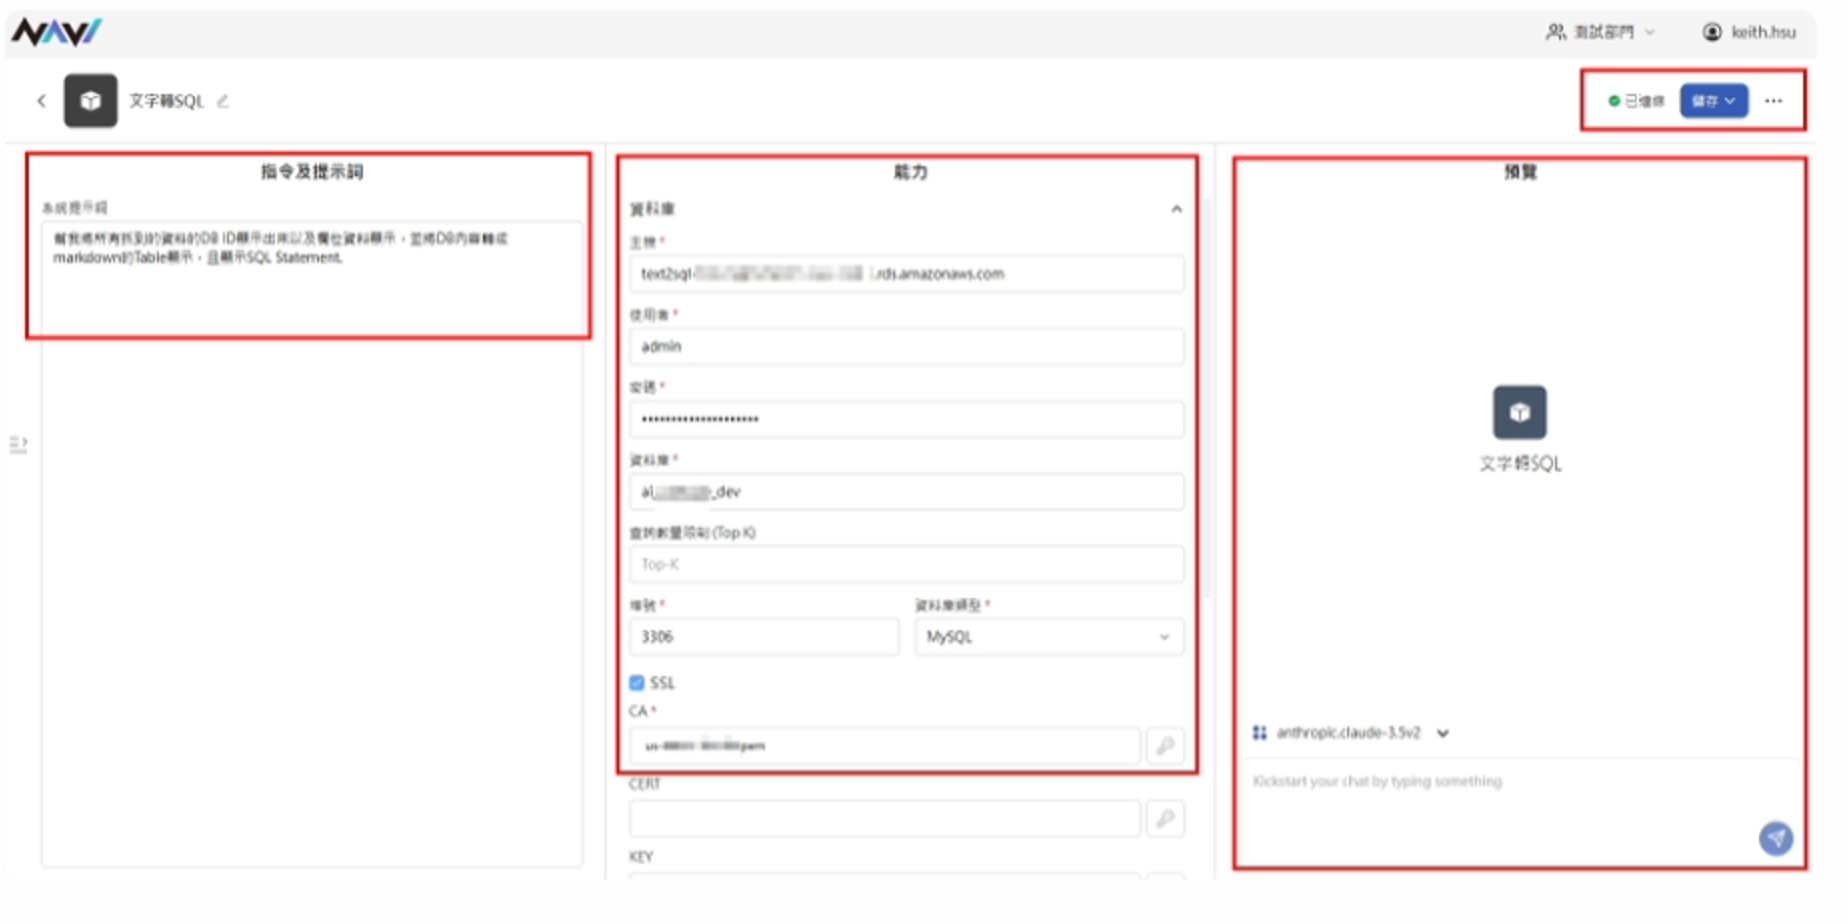
Step 2: Configure the Text2SQL Bot
The Text-to-SQL bot connects to a database and allows users to query its contents using natural language. Currently supports MSSQL and MySQL.
Instructions & Prompts:
- The prompt field lets you customize the system prompt for this bot. Enter rules you want applied to every response — for example: "Please provide me with the SQL query used for each search."
- Capabilities:
-
Host: The address of the server hosting the database.
-
Username: The username for the database server.
-
Password: The password associated with the database server user.
-
Database: The name of the database on the database server.
-
Query Limit: The maximum number of records returned per query.
-
Port: The port number for the database server.
-
Database Type: The type of database — currently supports MSSQL and MySQL.
-
SSL: If the database uses SSL certificates, check this option and upload the relevant CA certificate file. If a Cert and Key are also required, they can be entered in the optional fields below.
-
Parameters: Configure the LLM parameters that affect how the bot responds. From top to bottom: Temperature, Top-P, Top-K, and Retrieval Scope.
- Preview: Test your bot by entering a prompt here to preview its output.
- Bot Name: Click the edit option next to the bot name in the top-left corner to rename it.
-
Test Connection: After entering the database server details under Capabilities, the connection status will appear in the top-right corner — showing "Connected" if successful, or "Connection Failed" if unsuccessful.
-
Save: Click "Save" in the top-right corner to save your changes. You will then be prompted to select a publishing audience — currently, Text2SQL bots can only be published to the creator themselves.
4. Additional Options: Click the "…" menu on the editing page to access Import/Delete options.
- Import: Paste a JSON configuration provided by another user to copy their completed bot settings under "Capabilities."
- Delete: Permanently delete this bot.
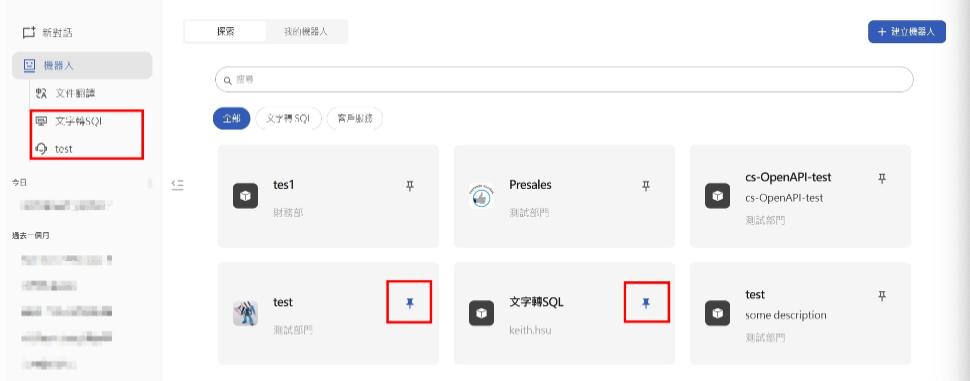
Step 3: Use the Text2SQL Bot
- Once your bot is configured, return to the bot page, find the bot you just created, and pin it. Pinned bots will appear permanently in the left-side feature bar for quick access.
- Click the Text2SQL bot in the left panel to start a conversation. The purpose of this bot is to let you query database content using natural language — no complex SQL statements needed. The bot will run the query for you and also provide the SQL statement for your reference. Common use cases include accounting pivot analysis, employee payroll summary queries, and historical sales performance lookups.